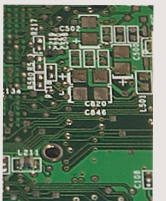
### Early Determination of PCB Size and Layer Count
The PCB size and the number of layers should be decided early in the design process. For designs that involve high-density Ball Grid Array (BGA) components, the minimum number of layers necessary for proper routing of these components must be considered from the outset. The layer count and stack-up method have a significant impact on the routing efficiency and impedance control of the printed lines. Additionally, the board size helps to determine the optimal stack-up configuration and line width required to achieve the desired electrical performance.
For many years, the common belief was that reducing the number of PCB layers would lower manufacturing costs. However, this view overlooks other factors that also influence the overall cost, such as material quality, manufacturing complexity, and the need for tighter tolerances. In recent years, the cost difference between multilayer and single-layer PCBs has narrowed considerably. Therefore, opting for more layers early on and distributing the copper evenly across the board can help avoid issues later in the design process.
By planning for more layers and ensuring an even copper distribution in the initial design phase, you minimize the risk of encountering signal routing problems, design rule violations, or space constraints later on. Addressing these concerns early in the design phase reduces the likelihood of having to add additional layers late in the project, which can be costly and time-consuming. Careful upfront planning in terms of layers and routing will significantly streamline the overall design and manufacturing process.

### 2. Limitations of the Automatic Routing Tool
The automatic routing tool is essential for PCB design, but it does not inherently understand the complexities of the design requirements. To achieve effective routing, the tool must be guided by specific rules and constraints, which vary for different signal lines. Each signal type has unique wiring needs, and it’s crucial to categorize these signals appropriately. Signals should be classified based on their characteristics and the specific design requirements, with higher-priority signals being subject to stricter rules.
These rules cover several critical factors, such as trace width, via count, signal line parallelism, signal crosstalk, and layer limitations. The adherence to these rules is vital for the performance of the routing tool. A detailed understanding of the design requirements is necessary for the routing tool to perform successfully. Furthermore, Design for Manufacturability (DFM) guidelines are also essential in optimizing the design for assembly. DFM rules typically impose restrictions on component placement to ensure easier assembly, and if the assembly team has some flexibility in component positioning, the routing tool can perform more efficiently. Hence, the defined constraints not only guide the routing tool but also influence the overall layout design.
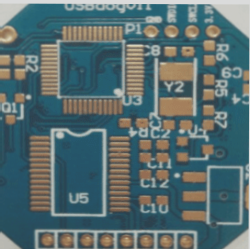
### 3. Considering Routing Channels and Via Placement
For PCB designers, routing channels and via areas are crucial elements, but the automatic routing tool treats each signal in isolation, often missing the bigger picture. To ensure the tool generates the desired layout, designers must set routing constraints, such as the signal layer assignments and the physical path limitations. These settings help the tool follow the designer’s intent more accurately.
In the fan-out stage of the design, it’s essential to ensure that every pin of a surface-mount device (SMD) has at least one via. This allows for flexible routing options, especially when more connections are required, and enables effective layer-to-layer connections. This approach is particularly useful for in-circuit testing (ICT) and circuit rework during production.
To optimize routing tool performance, it is essential to maximize the via size and trace width while maintaining a minimum clearance, ideally set to 50 mils. Using vias that allow for greater routing path density is another strategy to improve tool efficiency. During fan-out design, it’s also important to anticipate the potential needs for online testing. Test fixtures can be costly and are typically ordered only when a product is about to enter full-scale production. Waiting until this stage to ensure 100% testability by adding test points may be too late to implement necessary changes. Therefore, careful planning during the initial design phase can help avoid costly delays or modifications later in the process.
The PCB size and the number of layers should be decided early in the design process. For designs that involve high-density Ball Grid Array (BGA) components, the minimum number of layers necessary for proper routing of these components must be considered from the outset. The layer count and stack-up method have a significant impact on the routing efficiency and impedance control of the printed lines. Additionally, the board size helps to determine the optimal stack-up configuration and line width required to achieve the desired electrical performance.
For many years, the common belief was that reducing the number of PCB layers would lower manufacturing costs. However, this view overlooks other factors that also influence the overall cost, such as material quality, manufacturing complexity, and the need for tighter tolerances. In recent years, the cost difference between multilayer and single-layer PCBs has narrowed considerably. Therefore, opting for more layers early on and distributing the copper evenly across the board can help avoid issues later in the design process.
By planning for more layers and ensuring an even copper distribution in the initial design phase, you minimize the risk of encountering signal routing problems, design rule violations, or space constraints later on. Addressing these concerns early in the design phase reduces the likelihood of having to add additional layers late in the project, which can be costly and time-consuming. Careful upfront planning in terms of layers and routing will significantly streamline the overall design and manufacturing process.
### 2. Limitations of the Automatic Routing Tool
The automatic routing tool is essential for PCB design, but it does not inherently understand the complexities of the design requirements. To achieve effective routing, the tool must be guided by specific rules and constraints, which vary for different signal lines. Each signal type has unique wiring needs, and it’s crucial to categorize these signals appropriately. Signals should be classified based on their characteristics and the specific design requirements, with higher-priority signals being subject to stricter rules.
These rules cover several critical factors, such as trace width, via count, signal line parallelism, signal crosstalk, and layer limitations. The adherence to these rules is vital for the performance of the routing tool. A detailed understanding of the design requirements is necessary for the routing tool to perform successfully. Furthermore, Design for Manufacturability (DFM) guidelines are also essential in optimizing the design for assembly. DFM rules typically impose restrictions on component placement to ensure easier assembly, and if the assembly team has some flexibility in component positioning, the routing tool can perform more efficiently. Hence, the defined constraints not only guide the routing tool but also influence the overall layout design.
### 3. Considering Routing Channels and Via Placement
For PCB designers, routing channels and via areas are crucial elements, but the automatic routing tool treats each signal in isolation, often missing the bigger picture. To ensure the tool generates the desired layout, designers must set routing constraints, such as the signal layer assignments and the physical path limitations. These settings help the tool follow the designer’s intent more accurately.
In the fan-out stage of the design, it’s essential to ensure that every pin of a surface-mount device (SMD) has at least one via. This allows for flexible routing options, especially when more connections are required, and enables effective layer-to-layer connections. This approach is particularly useful for in-circuit testing (ICT) and circuit rework during production.
To optimize routing tool performance, it is essential to maximize the via size and trace width while maintaining a minimum clearance, ideally set to 50 mils. Using vias that allow for greater routing path density is another strategy to improve tool efficiency. During fan-out design, it’s also important to anticipate the potential needs for online testing. Test fixtures can be costly and are typically ordered only when a product is about to enter full-scale production. Waiting until this stage to ensure 100% testability by adding test points may be too late to implement necessary changes. Therefore, careful planning during the initial design phase can help avoid costly delays or modifications later in the process.