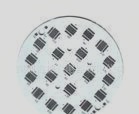
### PCB Assembly Skills 1: Selective Soldering Process
The selective soldering process involves several key stages: flux coating, board preheating, dip soldering, and drag soldering. Among these, flux coating plays a crucial role in ensuring a successful soldering outcome. Proper flux activity is essential at the end of the solder heating and soldering process to prevent issues such as solder bridging and oxidation of the PCB. During the flux coating phase, the flux is applied via an X/Y robot that carries the PCB, with the flux being sprayed precisely onto the soldering points using a dedicated flux nozzle. This step ensures that only the intended areas of the PCB receive the flux, promoting effective soldering.
### PCB Assembly Skills 2: Flux Spraying Accuracy in Reflow Soldering
In the reflow soldering process, accurate flux spraying is critical, especially when dealing with small components and tight tolerances. The most important factor here is ensuring that the flux is applied precisely to the required areas, preventing contamination of the surrounding regions. Micro-spraying is a popular technique where the minimum solder pattern diameter exceeds 2mm, and the flux is deposited with an accuracy of ±0.5mm. This accuracy ensures that the flux covers only the solder joints and not the surrounding PCB areas, thereby optimizing the soldering quality and reducing the risk of defects like bridging or excess solder.
### PCB Assembly Skills 3: Comparing Selective Soldering with Wave Soldering
To fully appreciate the advantages of selective soldering, it’s useful to compare it with wave soldering. The key difference between the two methods lies in the soldering process itself. In wave soldering, the entire bottom side of the PCB is immersed in a wave of molten solder, which covers all components in its path. In contrast, selective soldering targets only specific areas of the PCB, leaving the surrounding components unaffected. This focused approach is beneficial because the PCB material itself is a poor heat conductor, which means that adjacent components and unheated areas of the board remain undisturbed during the soldering process. This selective heating minimizes thermal stress and ensures higher precision in the solder joints.
### PCB Soldering Process: Guidelines and Best Practices
Flux must be pre-coated and soldered in advance during the PCB assembly process. Unlike wave soldering, where flux is applied to the entire board, in selective soldering, flux is only applied to the specific areas that require soldering. This technique is primarily used for soldering inserted components and offers precision. To achieve successful results, it is essential to thoroughly understand the selective soldering process and the specialized equipment required.
#### PCB Soldering Precautions and Best Practices
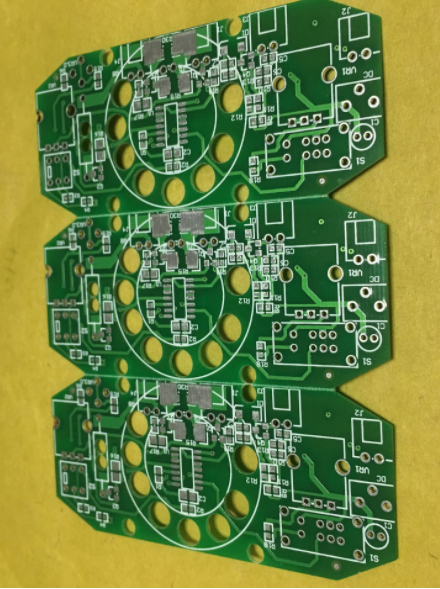
1. **Inspection of Bare PCB**
After receiving the bare PCB, inspect it visually to check for any short circuits or open circuits. Familiarize yourself with the schematic diagram and compare it to the PCB layout to ensure there are no discrepancies between the design and the board.
2. **Material Preparation and Component Classification**
Before starting the soldering process, ensure all materials and components are ready. Classify components according to size to streamline the process. Create a complete Bill of Materials (BOM) to ensure no parts are missed during assembly. If any parts are missing during the process, mark them on the BOM for easy identification and completion of the soldering steps.
3. **Static Protection and Equipment Setup**
To prevent static discharge from damaging sensitive components, always wear anti-static gear such as wrist straps and use mats. Before soldering, ensure the soldering iron tip is clean and free of contaminants. If you’re new to soldering, it’s recommended to use a flat-angle tip for better contact, especially when working with small components such as 0603-sized parts.
4. **Soldering Order: Small to Large Components**
Components should be soldered in order from the smallest to the largest. This ensures smaller parts do not obstruct the placement of larger components. Integrated circuit (IC) chips should always be soldered last to avoid any interference with smaller components.
5. **Orientation of Integrated Circuit (IC) Chips**
Always verify the correct orientation of ICs before soldering. For surface-mounted chips, the rectangular pad indicates the first pin. Begin by soldering one pin of the chip, adjust its position if necessary, and then solder the diagonal pin to secure the component in place.
6. **Polarity Considerations for Components**
Some components, such as SMD ceramic capacitors and voltage regulators, do not have polarity and can be soldered in any orientation. However, components like LEDs, tantalum capacitors, and electrolytic capacitors have clear polarity requirements. Always check the markings to identify the positive and negative terminals, especially for components such as diodes and capacitors. For chip LEDs, the direction of the chip typically indicates polarity.
7. **Crystal Oscillators and Pin Identification**
Passive crystal oscillators usually feature only two pins and have no polarity, while active crystal oscillators typically have four pins. Ensure you check the datasheet for pin definitions to avoid soldering errors.
8. **Soldering Through-Hole Components**
For through-hole components such as power modules, modify the component leads before soldering if necessary. Place and secure the component, then heat the pins with a soldering iron to melt the solder from the back side, allowing it to flow through to the front. Be cautious not to apply excess solder, and stabilize the component before soldering to avoid displacement.
9. **PCB Design Issues During Soldering**
Any design flaws noticed during the soldering process should be documented for future reference. Common issues include pad size inconsistencies, installation interference, or incorrect component packaging. Timely identification and correction of these issues are crucial for improving future designs.
10. **Inspection and Cleaning Post-Soldering**
After soldering, use a magnifying glass to inspect the solder joints for any defects, such as cold solder joints or unintended short circuits. Once the soldering is complete, clean the board using alcohol or other appropriate cleaning agents to remove flux residues and iron filings. This step is critical to prevent circuit shorts and to improve the appearance of the finished PCB.
By following these best practices and taking the necessary precautions, you can ensure high-quality PCB assembly, minimize errors, and improve overall soldering efficiency.