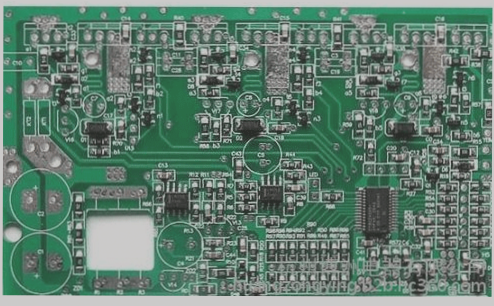
The chip components on PCB circuit boards are advanced micro-components with either no leads or very short leads. They are directly mounted on the printed circuit board and are a key aspect of surface-mount technology. These chip components offer numerous advantages, including compact size, light weight, high mounting density, enhanced reliability, strong vibration resistance, excellent high-frequency performance, and robust anti-interference capabilities. They are currently widespread in computer equipment, mobile communication devices, cameras, color TV tuners, VCD players, and other products, and their use continues to grow rapidly.
Common chip components include:
1. Chip resistors
2. Chip capacitors
3. Chip inductors
4. Chip diodes
5. Chip transistors
6. Chip-shaped small integrated circuits
These chip components are notably small, heat-resistant, and less prone to physical damage. However, their tiny pins can make them challenging to disassemble, complicating maintenance. Therefore, employing appropriate disassembly methods is crucial. Commonly used techniques include:
1. **Dedicated Tip Removal Method**
Special “Π” tips are available for this purpose. The width and length of the “Π” tip notch should match the size of the component being removed. This specialized tip can simultaneously melt the solder on both sides of the component, facilitating its removal. A homemade tip can also be used effectively.
**Homemade Method:**
Choose a copper tube with an inner diameter that matches the outer diameter of the tip. Flatten one end of the tube using a vise or hammer, then drill a small hole at this end, as shown in the diagram. Next, use two copper plates or pipes to create a horizontal section, with a length equal to that of the component to be removed. Drill small holes, flatten the end face, polish and clean the assembly, and finally secure it with bolts. This setup can be used to heat and remove the solder.
For a rectangular chip component with two solder joints, simply use a flat soldering iron tip with a width equal to the length of the component. Heat and melt both solder joints simultaneously to remove the chip component.
—

2. Copper Mesh Method
Copper-plated copper mesh is a mesh belt woven from thin copper wires, but can also be replaced by metal shielded wires or multiple flexible wires from cables. To use it, cover the network cable on multiple pins, apply rosin alcohol flux, heat with a soldering iron, then shake the network cable. The solder on each pin is absorbed by the wire. Cut off the wire for PCB soldering and repeat several times. The solder on the pins gradually reduces until the pins are separated from the printed circuit board.
3. Molten Tin Cleaning Method
When heating multi-leg parts with an anti-static soldering iron, clean the solder with a toothbrush or paint brush, and remove the parts quickly. After removing the components, clean the printed circuit board promptly to prevent short circuits caused by residual tin.
4. Lead Wire Breaking Method
This method is suitable for removing chip-mounted integrated circuits. Use a paint wire of appropriate thickness and strength to pass through the gaps in the IC pins. Fix one end of the enameled wire in place, and hold the other end by hand. When the solder melts, pull it out. The enameled wire “cuts” the solder joints, and the integrated circuit pins are separated from the printed circuit board.
5. Disassembling the Suction Device
There are two types of soldering equipment: ordinary soldering equipment and soldering iron. For a normal suction device, press down on the piston rod. When the soldering iron melts the solder joints of the disassembled parts, position the suction nozzle close to the melting point, press the release button, and suck up the molten tin. When the piston rod bounces back, the molten tin is removed. Iteratively, the removed part can be separated from the printed board. The tin-plated soldering iron is a special tool that can be used similarly to traditional PCB soldering irons.


