The Essential Steps in PCB Screen Printing Stencil Preparation
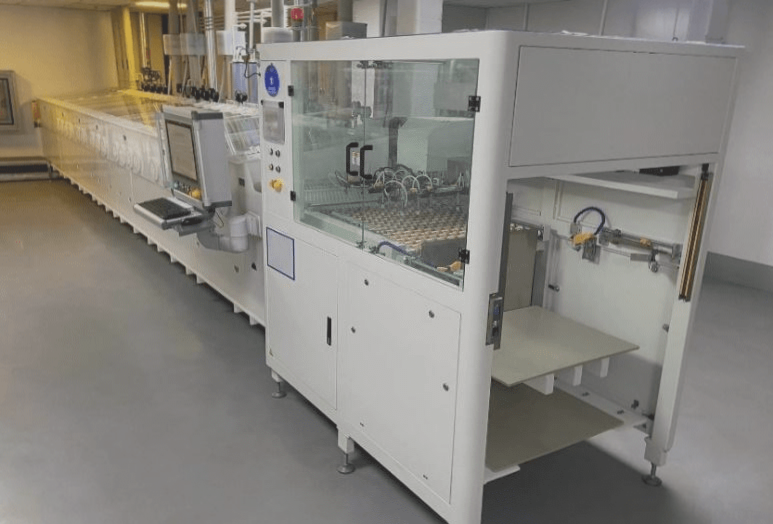
The production process of PCB screen printing stencils involves two main stages: drawing and drying. PCB manufacturers offer a comprehensive service that includes PCB design, fabrication, soldering, SMT chip processing, PCBA assembly, materials sourcing, and coil winding.
Key Steps in Screen Preparation
- Screen Cleaning: Remove residual adhesive and debris for proper adhesion.
- Level Checking: Ensure the screen frame is flat to distribute mesh tension evenly.
- Bottom Layer Glue Application: Apply Nanbao grease to enhance mesh adhesion.
- Mesh Tensioning: Stretch the mesh uniformly over the frame.
- Tension Measurement: Verify tension levels for optimal printing.
- Adhesive Application: Seal the mesh to the frame securely.
- Edge Sealing: Prevent fraying by sealing the mesh edges.
- Storage: Store the prepared screen in a clean, dry environment.
Importance of Screen Preparation
The meticulous screen preparation process directly impacts the quality and precision of PCB screen printing. It ensures a stable surface for consistent printing results, contributing to efficiency and performance during manufacturing.
Comprehensive Guide to PCB Screen Printing and Mesh Preparation
This guide offers a detailed approach to PCB screen printing preparation, emphasizing mesh selection, tensioning, and gluing for high-quality results essential in PCB assembly and functionality.
Mesh Preparation and Gluing Process
- Initial Gluing: Apply glue, adjust mesh position, and tension for even spread.
- Mesh Tensioning:
- First tension: Set to 26, then adjust to 24 after 5 minutes.
- Second tension: Increase to 28, then adjust to 26 after 5 minutes.
- Third tension: Set to 32, then adjust to 30 after 5 minutes.
- Fourth correction: Maintain tension at 32 for stabilization, aiming for 30 as the final tension.
Mesh Preparation for Optimal Screen Printing Results
Glue Application:
Apply glue evenly to the screen frame and mesh surface, ensuring no glue drips into the center. Allow the glue to dry for 8 minutes, then spread it evenly with a spatula. Use an air blower for faster drying before proceeding with mesh installation.
Mesh and Frame Finishing:
Trim excess mesh, record installation details, and seal frame corners with red glue and waterproof tape to prevent water penetration and protect the mesh during use.
Mesh Cleaning and Preprocessing
Net Washing:
- New Mesh: Use grinder paste to remove grease and contaminants.
- Old Mesh: Clean with ghost paste, pulp powder, and rinse with detergent and water.
Drying the Mesh:
Dry the mesh at temperatures below 48°C to avoid damage, preparing it for the next steps.
Film Application and Mesh Sizing
Film Selection and Application:
Choose a film slightly larger than the mesh, apply it evenly, press out excess water, and let it dry completely.
Mesh Sizing:
Apply mesh pulp in layers, including green oil, base oil, surface oil, and blue gum, ensuring even coverage and drying for optimal results.
Mesh Specifications and Printing
Mesh Selection:
- 120T, 100T, 110T: General use
- 51T: For carbon oil
- 24T: For blue glue and thermosetting green oil
- 77T: For green oil
Film Exposure:
Expose the film on the mesh with specific exposure times based on the oil type. Rinse and dry the mesh post-exposure.
Sealing and Finishing:
Seal the film edges, check for accuracy, make necessary repairs, and record details upon completion.
PCB Silk-Screen Specifications
General Requirements:
- Component Identification
- Character Orientation
- No Silk Screen on Pads
- Clear Polarity Markings
Design and Layout Specifications:
Ensure silk screen does not obscure device numbers, avoid application on via holes or pads, and maintain clear polarity markings for polarized components.
Silk-Screen Printing Guidelines for PCBs
- Silk-Screen Spacing: Maintain a minimum spacing of 5 mils between silk-screen characters.
- Connector Orientation: Clearly indicate the direction of directional connectors on the silk screen.
Additional Information:
- Include essential details on the PCB, such as board name, version number, and production date.
- Add a barcode frame (42×6) for easy scanning during assembly and testing.
- Display anti-static symbols and manufacturer details for safe handling.
Conclusion
This guide provides crucial steps for successful PCB screen printing, covering mesh preparation, gluing, film application, and drying. Adhering to proper mesh tensioning, film exposure, and silk-screen printing standards is vital for top-notch PCB manufacturing. While these steps offer general advice, adjusting to meet specific project requirements is sometimes necessary. Continuous learning, adaptation, and process enhancement are key to achieving optimal outcomes.